Account Creation and Activation
By default, accounts will be automatically built out into the Managed Provisioning Portal when the bvoip phone system is provisioned. In order to sync a device into the Managed Provisioning Portal automatically, the extension will need to have MPP Enabled setting turned on for each extension.
Phone System Shows as MPP Disabled?
If your phone system shows as MPP being disabled, ensure that one of the extensions has the MPP option set to Yes as shown in the instructions below. If this option is not available, please reach out to Support.
For systems ordered prior to 06/01/2025
ℹ️ This should be done automatically for all new systems made in June 2025 and later.
- Log into the bvoip phone system.
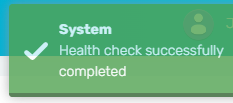
- Go to Extensions > Devices

- Click on the Run Health Check button. A display message of Health Check Completed will appear when completed.
Configuring a Device
- Login to the phone system
- Go to Extensions > Extensions
- Double click or click the Edit button for the desired extension.
- Go to Provisioning > Deskphones
- Locate the MPP Enabled drop-down and set it to Yes

- Click the Save button. This will close out the extension.
- Go to the Extensions > Devices menu
- Click on the Sync All Devices button. Each device will show the word Configured or Live when completed.
The extension will then automatically have any phones that are setup on the extension and MPP compatible provisioned. If the phone has not been setup on the extension yet, please refer to our General Provisioning Setup Guide. A factory reset will be needed to complete the provisioning process for the phone.
Enabling Multiple Extensions?
The MPP Integration steps for configuring a device can be done for multiple extensions.
- Select the desired extensions with the checkboxes on the left.
- Click on the Bulk Management > Bulk Edit

- Go to the Provisioning tab.
- Select Yes from the Enabled drop-down, and then Save
